QUICKSTART GUIDE
Introduction
This Quickstart guide is intended for software engineers and programmers to quickly set up Information Techonology (IT) resources for a single national SRS context. This system should be considered a starting point that can be adapted to fit context needs.
Before you begin
You will need some development experience and tools.
- Experience configuring linux server via docker
- Windows or Linux computer (laptop or desktop) with admin rights
- Control of Domain name DNS settings for which you can add and control subdomains
- Basic IT Skills
- Software installation from github
- Integrated development environment
- Database: import data, query
- Command line usage
Data Collection Platform – Set up ODK Central on your Linux server
A Linux server is required. Whether installing on Premises or in the Cloud, follow the directions for Installing Central on DigitalOcean. These directions are a good starting point even if you’re doing an On Premises install.
After your server is up and running, proceed to the steps below.
Tech Tip: Digitial Ocean
During development and initial testing, you can purchase a cloud server and configure ODK Central in a short time (less than one hour if you’re experienced). Reminder: Only share sensitive data to a cloud server if allowed under IRB rules or country laws.
Get $200 free credit on Digital Ocean with our VIVA referral link
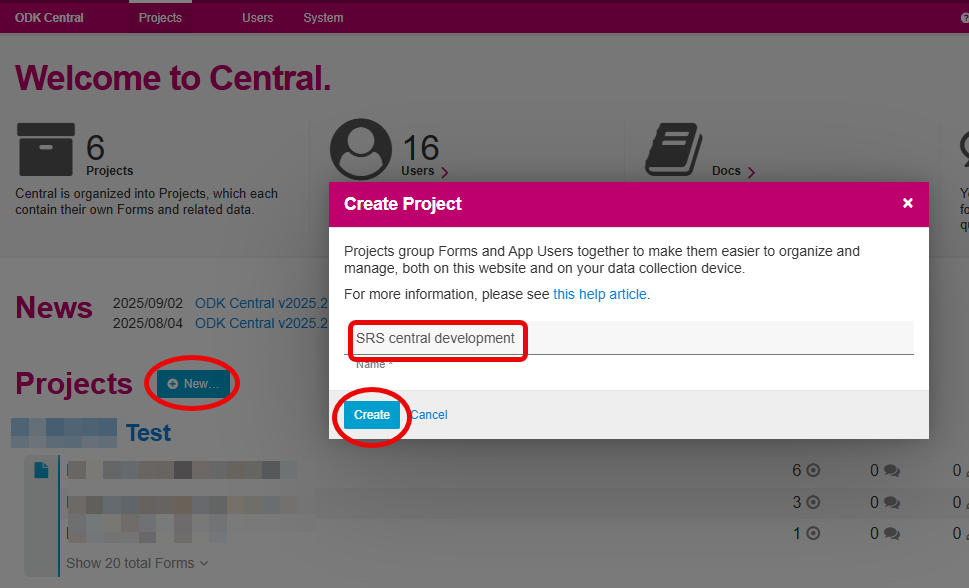
ODK Central – Create Project
- Create new Project
- Give the project a meaningful name (this can be changed later)
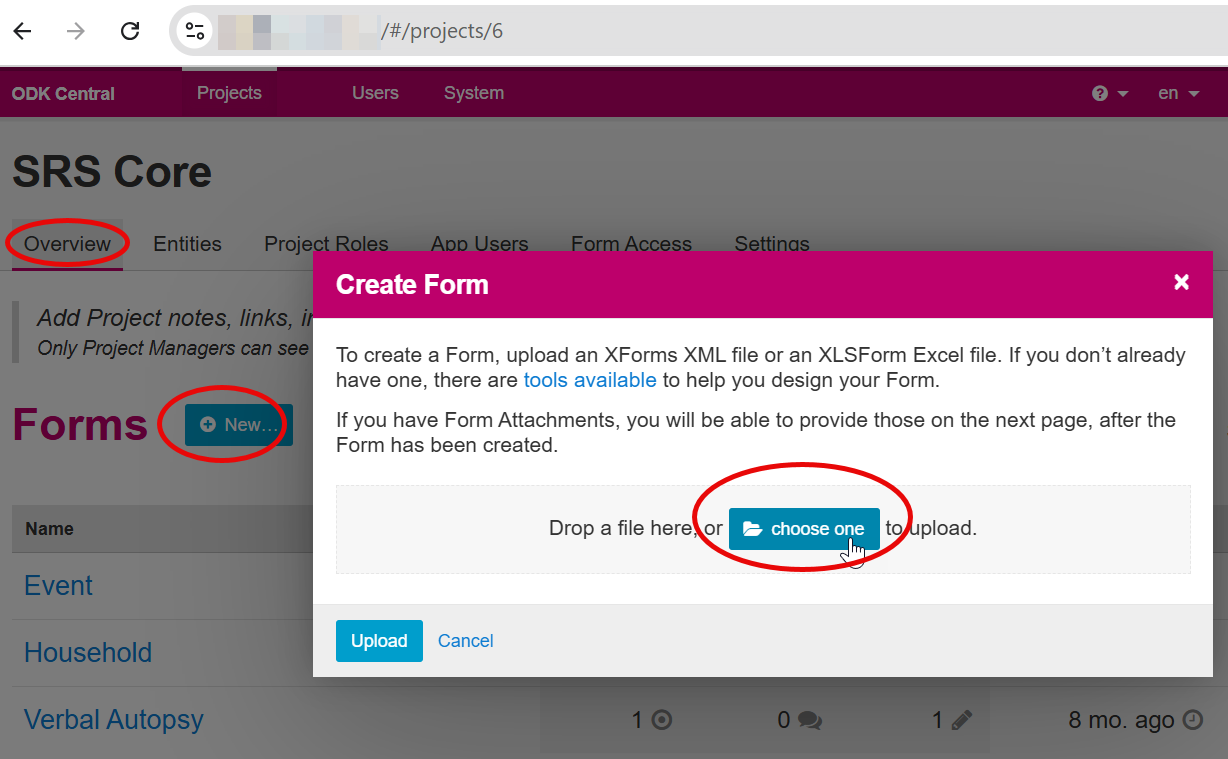
ODK Central– Install forms & Create Users
- Download 3 forms:
- Upload into your ODK Central Server.
ODK allows for parallel data collection and testing of new form versions before publishing. All forms must be published for data collection. 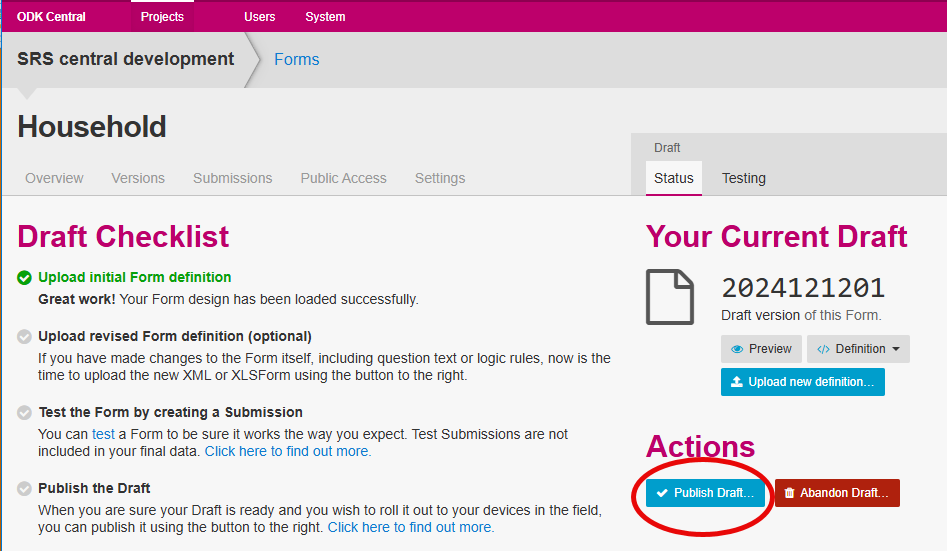
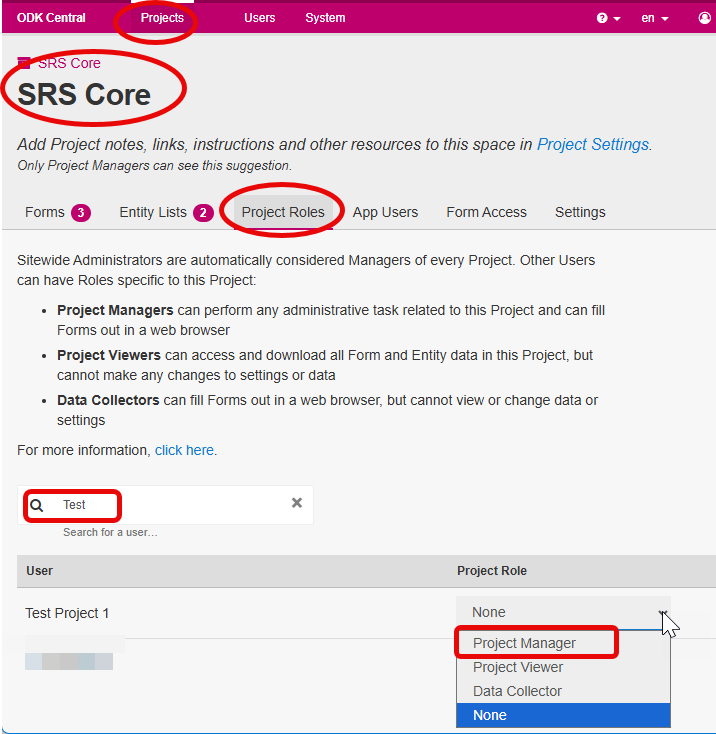
- Create a Web User for the SRS ODK Project
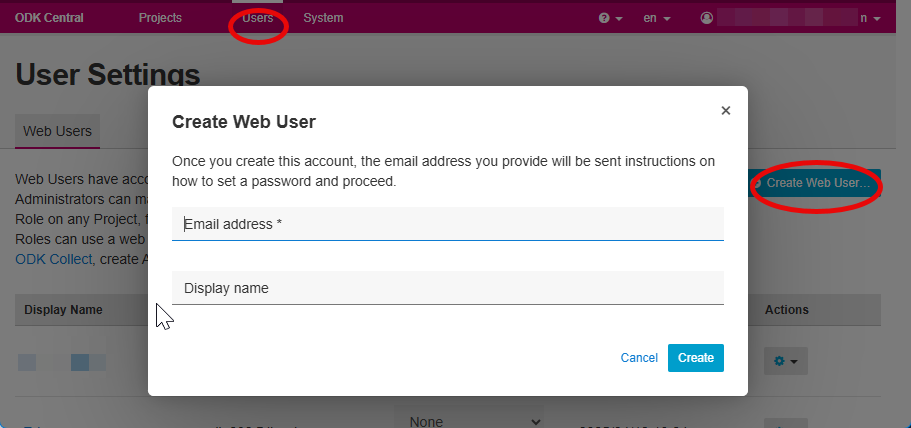
- This user does not need to be an Administrator.
- This user’s account will be used for API access.
Return to Project page and assign Project Manager role under > Project Roles
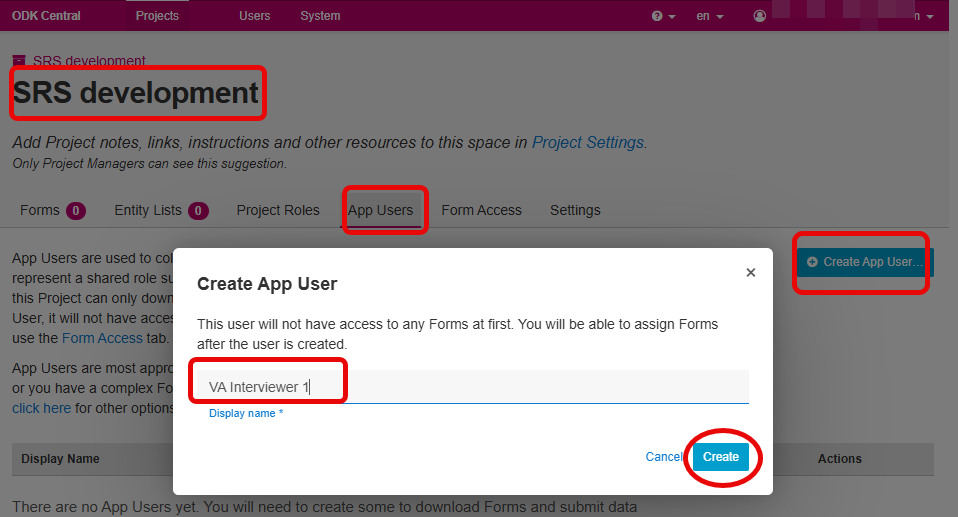
- Create App User accounts for your data collectors. These accounts are needed for testing tablet based offline data collection using ODK Collect. They are not directly used by the SRS-CMS system. More information about ODK Web Users and App Users is available here.
- For testing, we’ll create two App User accounts. You can name these as you like:
- Verbal Autospy data collector (VA Interviewer 1)
- Event data collector ( DC 1)
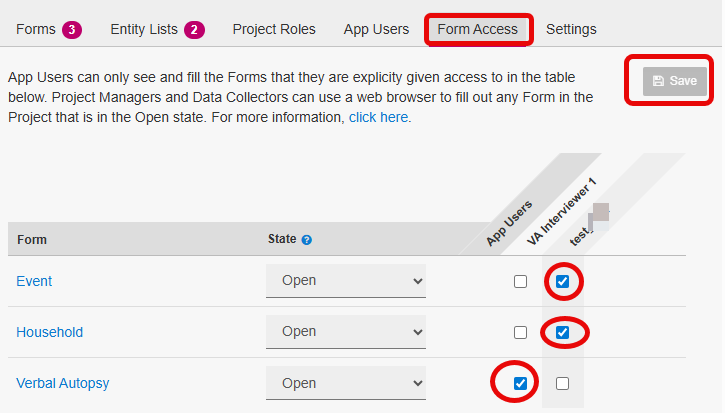
- Assign Form Access:
Case Management System – SRS-CMS python
Development/Testing Setup
This section covers Installation and configuration on a local computer. These directions do not involve Docker software.
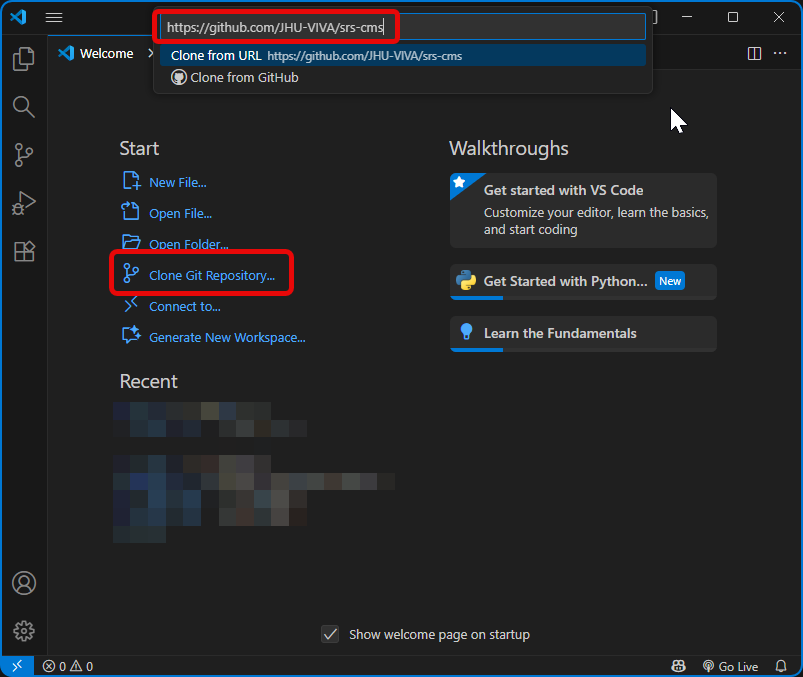
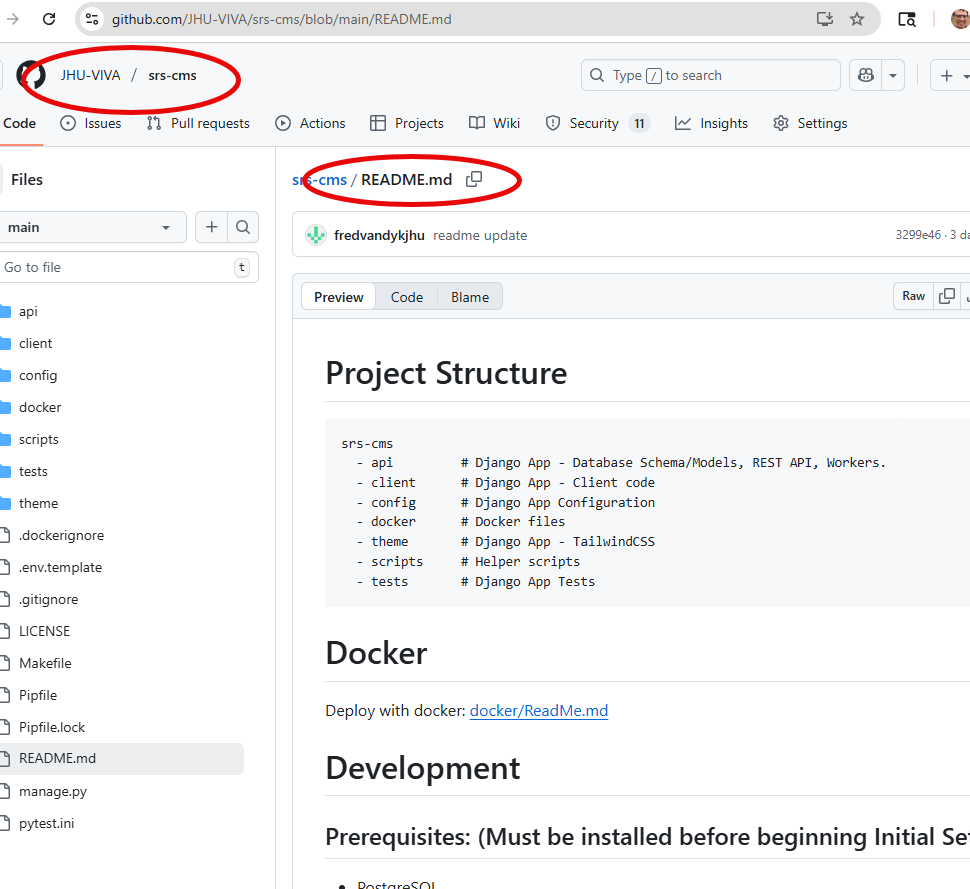
- Clone SRS-CMS project from github repository.
Use a Development Enviroment that you are comfortable with. Recommended: VS-Code, PyCharm, or Cursor. Clone the SRS-CMS github repository here: https://github.com/JHU-VIVA/srs-cms. Examples shown using VS-Code.
- Prerequisites: Be sure to install all listed software packages. See WINDOWS notes if applicable.
- Initial setup: Run commands in order listed
WINDOWS Configuration extended notes
- After prerequisites: Make PostGreSQL Database (Windows). Example using pgAdmin interface:
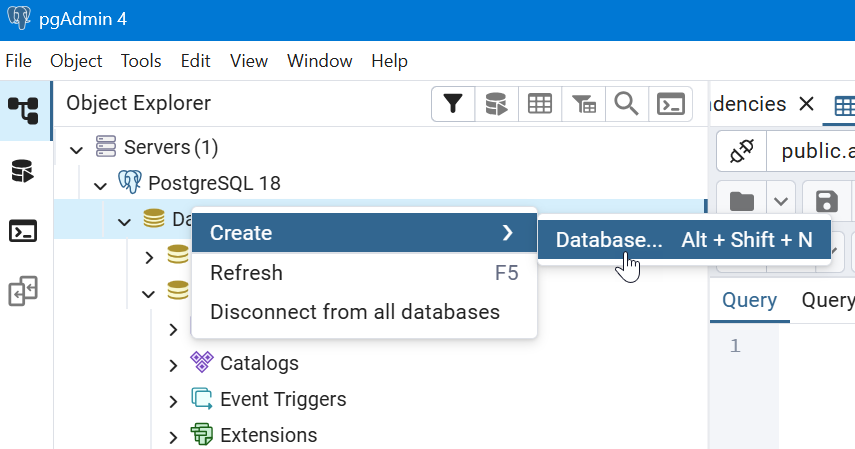
- Name the database: dev_srs_cms (or name to match value assigned to DB_NAME in .env file)
- In terminal, run these commands
- make init_database
- make migrations
- make migrate
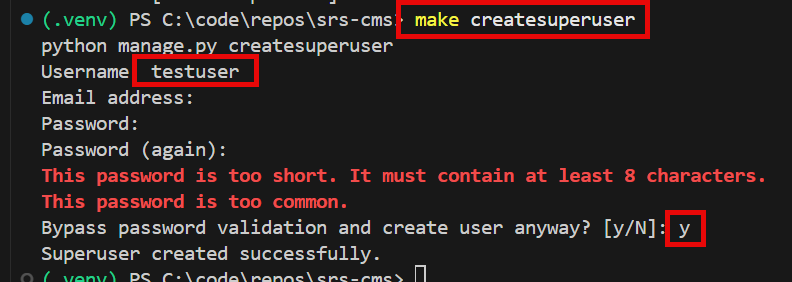
- make createsuperuser (Email Address is optional, skip during development setup. Password can be very short development.)
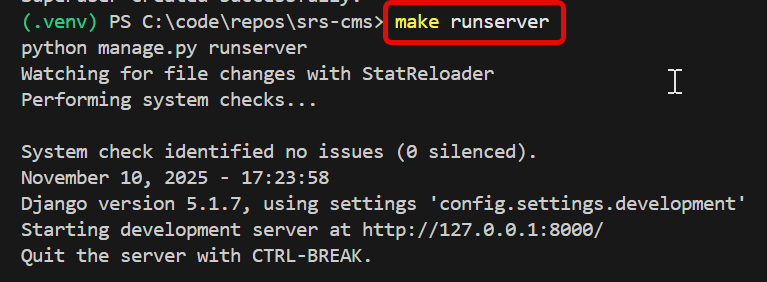
Run the Development server
- make runserver >
- (in separate terminal) make watch_client

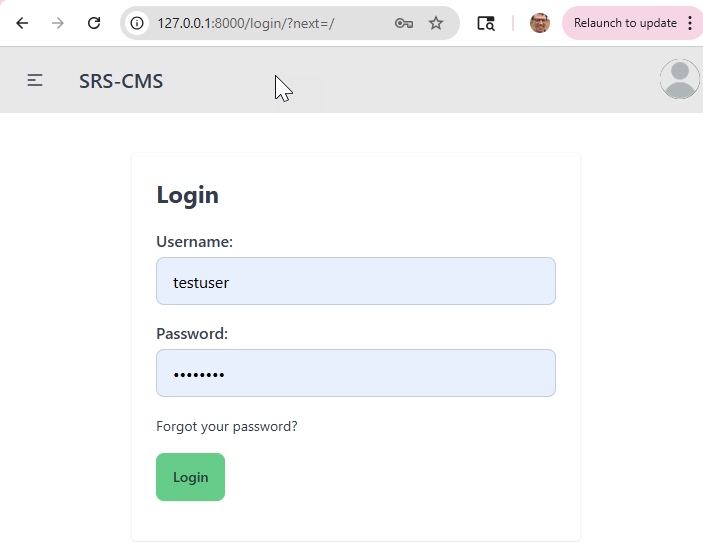
If successful, you’ll see the login screen. Login with your superuser account.
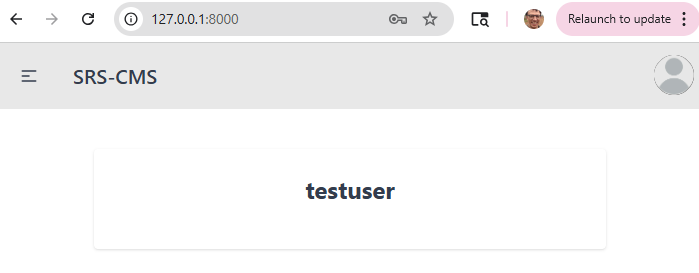
Landing page after login.
SRS-CMS Admin site (Django Admin)
SRS-CMS uses Django Admin for basic management of data models, users, and ODK tasks. Browse to http://127.0.0.1:8000/admin/. Use SuperUser credentials. 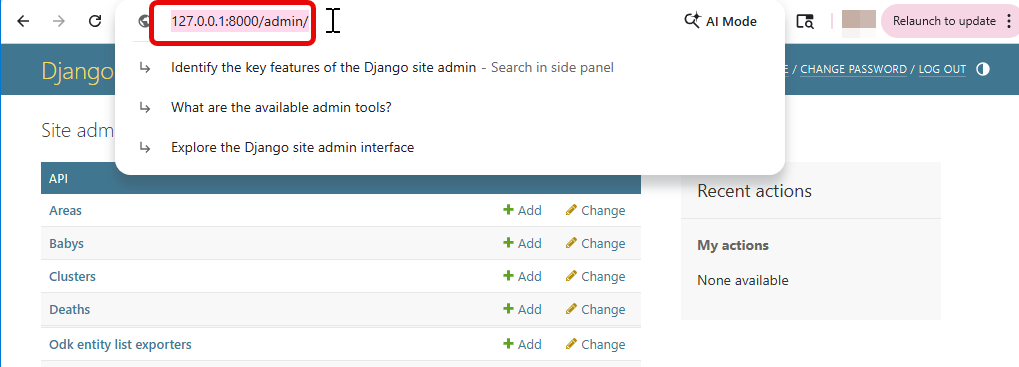
More information about the Django Admin software is available here.
Staging/Production Server Setup
Overview
The application supports two deployment environments with Docker, staging and production, which share the same setup process but use different configuration files and seed data.
Each environment is controlled by the variable $APP_STAGE, which is set to either staging or production when running the setup or management commands. The default $APP_STAGE is production.
The workflow is:
- Prepare environment-specific configuration: Each environment has its own
.envfile, Nginx configuration, crontab, and optional seed data. These files define all environment-specific settings. - Build the Docker image: Once the configuration files are in place, you build the Docker image for the selected environment. The image includes the backend API, frontend, and supporting services.
- Run the application via Docker Compose: Starting the application launches all required containers (web server, API service, database, etc.) using the environment-specific settings.
- Initialize data and create a superuser: For new deployments, you can load seed data and create a superuser account to access the administration interface.
- Operate and maintain the environment: You can start/stop the application, import or export ODK data, and run maintenance tasks, all by specifying the appropriate
$APP_STAGE.
Installation and Configuration
- Complete the setup steps described in the Docker ReadMe. This document also includes the full set of commands for building, running, and managing the application using Docker.
Data Preparation
Seed Data
See the Seed Data ReadMe for details on how the Project data and ETL configuration is defined and seeded for each environment.
ETL (Extract, Transform, Load) Summary
The ETL system manages data flowing into and out of the application using ODK Central. It includes:
- Importing form submissions (Events, Deaths, etc.) from ODK Central
- Exporting Entity Lists (VA Preload) back to ODK Central
Both processes use ETL mappings to control field definitions.
Importing Data from ODK Central (Form Submissions)
- Import form submissions from ODK Central: The system fetches the appropriate records based on the last imported date/time.
- Map and transform fields: ETL mappings define how ODK fields map to application database fields. Optional transformers apply custom logic (formatting, cleanup, conversions).
- Create primary and related records:
- The primary importer creates the main database record (e.g., Event, Household).
- Child importers create related records such as Deaths, Babies, Household Members.
- Track import jobs: Each import run generates an odk_form_importer_job record, which logs:
- Import start and end date
- Status
- Command arguments
- Summary of results
Imports are triggered through:
python manage.py odk_import_form_submissions
Exporting Data to ODK Central (Entity Lists)
The ETL system also exports internal data to ODK Central in the form of Entity Lists.
- Export Entity Lists to ODK Central: The system fetches the appropriate records.
- Map and transform fields: ETL mappings define how application database fields map to ODK Entity Lists.
- Build the Entity List payloads: The system compiles the appropriate records into ODK Entity List structures.
- Upload to ODK Central: The system automatically uploads to the corresponding ODK Entity Lists to ODK Central.
- Track export jobs: Each export run creates an odk_entity_list_exporter_job record, which logs:
- Export date
- Status
- Command arguments
- Summary of results
Exports are triggered through:
python manage.py odk_export_entity_lists
ETL Configuration
The ETL configuration defines how the system transforms, stores, and exports data for each ODK Form and Entity List. All configuration is stored in the database (seeded from JSON files), and is built from four core model groups:
- ODK Projects & ODK Forms
- Importers (OdkFormImporters)
- Exporters (OdkEntityListExporters)
- ETL Documents & ETL Mappings
Each ODK Form and ODK Entity List define which ETL Document to use, and the ETL Document provides the mapping rules for imports and exports.
1. ODK Projects and ODK Forms
OdkProject
Represents a project on ODK Central.
project_idcorresponds directly to the ODK Central project ID- Projects can be enabled/disabled for importing and exporting
- Projects contain one or more OdkForms and OdkEntityLists
OdkForm
Represents a specific ODK Form and version inside a project.
Fields include:
xml_form_id- the form ID from ODK Centralversion- the exact form version to import from ODK Centralis_enabled- controls whether this form is included in import operations
How ODK Forms relate to ETL Each ODK Form defines:
- Which importers should process its form submissions
- Which ETL Document provides the field mappings
2. Importers (OdkFormImporter)
The OdkFormImporter model connects an ODK Form to the importer class that will process it.
Each importer defines:
etl_document- the ETL Document that describes how fields are mappedimporter- which importer to runimport_order- determines the primary importer (order = 0 or lowest) and subsequent child importersis_enabled- controls whether this importer runs
A form may have multiple importers:
Primary Importer -> creates the main record (e.g., Event, Household)
Child Importers -> create related records (e.g., HouseholdMembers, Deaths, Babies)
Every time an importer runs, an OdkFormImporterJob is created to log:
- submission date range processed
- any arguments used
- results
- status (RUNNING, SUCCESSFUL, ERRORED)
3. ETL Documents and ETL Mappings
EtlDocument
Defines which mapping rules apply to:
- a specific ODK Form or ODK Entity List
- a specific form or entity list version
Fields include:
name- descriptive name (usually matches the form name)version- corresponds to the ODK form or ODK Entity List versionsource_root- the root object of the document for mapping (optional)
EtlMapping
Each ETL Document contains many ETL Mappings. These describe how individual fields should be transformed.
Fields include:
source_name- field in the ODK form submission or the database to map fromtarget_name- field in the Django model or exported document to set thesource_namevalue totarget_type- datatype of the target fielddefault- default value when source is missingtransform- JSON configuration for field transformeris_required- enforces that the source document or database table must contain the fieldis_primary_key- identifies a field as a primary key
These mappings serve two directions:
3.1 Import
ODK Central form submission -> mapped fields -> Django models -> Database
3.2 Export
Database -> Django model -> mapped fields -> ODK Central Entity Lists
4. Entity Lists and Exporters
Entity Lists support ODK Central’s Entity List based workflows (currently only VA Preload).
OdkEntityList
Defines an Entity List within a project.
Fields Include:
name- matches the ODK Central Entity List name exactlyis_enabled- controls whether this Entity List should be exported
OdkEntityListExporter
Connects an Entity List to:
etl_document- the mapping rules to useexporter- the exporter to runis_enabled- whether this exporter is enabled
Every time an exporter runs, an OdkEntityListExporterJob is created to log:
- Export timestamp
- Selected arguments
- Results (counts, errors, etc.)
- Status (RUNNING, SUCCESSFUL, ERRORED)
Relationship Summary
ODK Project
├── ODK Entity Lists
│     └── ODK Entity List Exporters
│            └── ETL Document
│                   └── ETL Mappings (Database -> ODK Central entity list fields)
└── ODK Forms
      └── ODK Form Importers (1 primary + N children)
             └── ETL Document
                    └── ETL Mappings (ODK Central form submission fields -> Database)
Geographic data (Cluster data)
Three data tables must be prepared and uploaded to the SRS-CMS prior to data collection.
- area table
- cluster table
- province table
Background Initially, SRS clusters will be identified by a series of hierachical geopolitical divisions. For example: Province > District > Constituency > Ward > … > Enumeration Area
A Cluster can be a group of enumeration areas or it could be a subset of homes within a Constituency or Ward (as per example).
It is a best practice to assign a Cluster ID (a unique identifer) to this cluster. This is important for data managers and statisticians. It also streamlines the work of a data collector assigned to a Cluster. They will not have to pick from a cascading menu of Provinces, Districts, Wards, etc. It is critical that the data collector cannot easily choose the wrong cluster. The SRS-CMS provides for a 6-character cluster ID with these important features:
- easy to memorize
- non-sequential: made of random characters and numbers
- checksum validation within ODK Collect: resistant to typos
Link to Cluster ID tools and info here
Describe how to create area table
Describe how to create cluster table
Describe how to create province table
Run and Manage Server
The application is designed to run entirely within Docker, using make commands for building, starting, stopping, and maintaining all services. Both the back end (API, admin interface) and the front end run inside Docker containers, along with supporting services such as PostgreSQL and Nginx.
For full setup and runtime command references, see the project’s Docker ReadMe.
All make commands in this section must be run from within the
SRS-CMS/docker/folder.
Back End – Admin Interface
Overview
The application includes an administration interface for managing:
- ODK Projects and Forms
- ETL Documents and ETL Mappings
- Importers and Import Jobs
- Entity Lists and Exporters
- Provinces, Clusters, Staff, and other operational data
- User accounts and permissions
- Events, Households, and other imported and exported data
This admin interface is available once the server is running. By default it is accessible at:
http://localhost/admin/
Get Data from ODK Central
The server sends and retrieves ODK data through the ODK Central REST API. This is handled entirely through management commands and the ETL framework.
The default cron schedule for importing form submissions is once a day at 12:00am.
To manually fetch and process form submissions from ODK Central, run:
make odk_import_form_submissions
This command:
- Connects to ODK Central and retrieves form submissions for all enabled OdkProjects and OdkForms.
- Applies the configured ETL Mappings and transformers.
- Creates new records in the database.
- Logs the operation in
odk_form_importer_jobsfor auditing and troubleshooting.
Send Data to ODK Central
The application sends data back to ODK Central by generating and uploading Entity Lists, such as the VA Preload dataset.
The default cron schedule to export entity lists is once a day at 1:00am.
To manually export Entity Lists, run:
make odk_export_entity_lists
This command:
- Loads all enabled OdkEntityLists for the projects.
- Runs the configured OdkEntityListExporters for each list.
- Uses the corresponding ETL Document to map database fields -> ODK Entity List fields.
- Uploads the Entity List to ODK Central via its REST API.
- Logs the operation in
odk_entity_list_exporter_jobsfor auditing and troubleshooting.
Front End – Schedule VA’s
OUTLINE
- Introduction
- Data Collection Platform – Set up ODK Central Server
- Create Project
- Install forms
- Household
- Events
- Verbal Autopsy
- Entities: TODO: Research and better understand how to Create Entity: va_preload
- ODK Collect setup
- Case Management System – SRS-CMS python
- Development/Testing Setup
- Installation and Configuration
- Connect to ODK Server
- Staging/Production Server Setup (TODO: Describe differences from Development. Is this Docker-based?)
- Installation
- Configuration
- Data Preparation
- ETL (Extract, Transform, Load) configuration
- SRS-CMS/API/DEV etl_ json files
- Geographic data (from Country context) TODO: Describe how to configure geographic cluster data for country context
- ETL (Extract, Transform, Load) configuration
- Run and manage server
- Back End – Admin interface
- Overview
- Get data from ODK Central via API
- Front End – Schedule VA’s
- Back End – Admin interface
- Data Transfer
- Extract from CMS
- Household
- All Events
- Verbal Autopsy Interview Schedule
- Extract from CMS
- Extract from ODKCentral
- Verbal Autopsy Data
- Operational Reporting (R Studio or Collaborative Analysis Platform)
- Cause of Death (R Studio or Verbal Autopsy Explorer)
- Verbal Autopsy Explorer
- OpenVA (R packages) https://openva.net/site/pages/software.shtml
- Development/Testing Setup
| Last updated |
|---|
| 9 January 2026 |